


Digiscoping is the marriage of a digital camera and a spotting scope. There’s a wee bit of skill involved, but everyone’s doing it!
I’ve been digiscoping since Feb 2002 when the finding of a Grey Phalarope on one of our local patches spurred me in to taking the plunge. Since then I’ve taken tens of thousands of images, contributed photos to magazines, journals, brochures, websites etc – its great! My first ever subject, the Grey Phalarope, was used by both Bird Watching and Practical Photography mags!
In summer 2004, Bird Watching magazine asked me to be one of the three main contributors for their Digiscoping Made Simple supplement and Atropos asked me to write an article on Digiscoping Insects (Atropos 20: 35-41). I’ve contributed to Leica’s birding and nature watching brochures for the last three years.
I also post my pictures on my own website, Toadsnatcher.com, on my blog, Toadsnatcher – warts ‘n’ all and on the local Peterbirding site.
Well, if looking at my pics helps you take the plunge, then bear in mind you do need to invest in good equipment and know a little about what settings you need to take good shots. A fair bit of fieldcraft helps – but you’ll soon learn what to do and what not to do! If you can, get a copy of Digiscoping Made Simple from Bird Watching magazine – its full of helpful advice on equipment, techniques and settings.
EQUIPMENT
Scope: Leica APO Televid 77 with fixed 20xWW eyepiece
Camera: Nikon Coolpix 995
Adaptor: London Camera Exchange for Leica scope eyepieces
Shutter release: Nikon digital cable remote control
Memory cards: 2x 128Mb, 2x 64Mb, 1x 16Mb
Monitor shade: Nikon sunshade
Two rechargable batteries plus standard Duracell for emergencies (never needed yet!)
SETTINGS
Mode: manual
Focus mode: macro
Centre-weighted focus
Aperture priority
White balance: auto
Metering: Spot AF area
Continuous shooting
Best Shot Selector: off
Image adjustment: Less Contrast
Saturation: Auto
Image quality: fine
Image size: 2048x1704
ISO: 100
Image sharpening: high
Focus options –
AF Area Mode: manual
Auto Focus Mode: single AF
Focus Confirmation: on
Exposure compensation usually set to between -0.3 and -1.3 (rarely at 0)
DIGISCOPING INSECTS
This article is from Atropos (20: 35-41) but although insects are the subject matter, it gives a good grounding into digiscoping in general.
In recent years, the birding community has embraced the digital age whole-heartedly with the advent of digiscoping. Birders have long been able to attach an SLR camera body to their telescopes with the aid of special photoadapters, but the combination of telescope and SLR camera never really caught on as the focal lengths were never actually that great. For example, an SLR camera body attached to a Leica APO Televid 77 produced a long-telephoto lens of 800mm at f10.4. Nothing spectacular.
Those birders who long wanted to take photos but were put off by the reality, have been quick to see the potential in marrying digital cameras to their scopes. At first, this was achieved by using video and camcorders, but with the arrival of digital still cameras, this became even more appealing, since the cameras were both smaller in size and cheaper to buy than moving footage units. Besides, most people want stills and not film from which you have to then take grabs (stills) if you want them.
Initially, digiscoping was undertaken by simply hand-holding the camera to the eyepiece of the scope, combining the telescope’s magnified image with the magnification power of the camera’s lens. Suddenly birds could be photographed by anyone with a scope! Wow! Home made adapters soon appeared, then commercially available adapters, and the rest, as they say, is history. The digiscoping market was born.
I bought my first digital camera, a Nikon Coolpix 995, in February 2002 and have taken around 17,000 images with it. I may have kept less than a third of these, but herein lies another benefit of the digital age – after the initial investment it’s virtually cost-free. As an active birder I already had a scope, and I already had both desktop and laptop computers (most people have desktop machines these days). So all I required was the camera, software (which comes with the camera), the appropriate adapter for my scope and a handful of optional extras – digital remote for the camera, several memory cards, spare rechargeable battery and a sunshade for the camera’s monitor. The whole lot set me back around £800, but it has cost me nothing since – no film or developing charges for those 17,000 photos!
My digiscoping camera kit – Nikon Coolpix 995, digital cable release, scope adapter, sunshade, extra memory cards, spare rechargeable battery and emergency standard battery

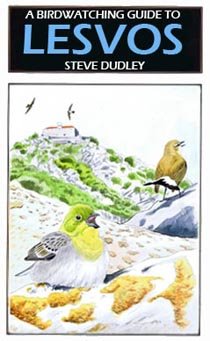
By the spring of last year I had been using my camera with my scope for several months when I found myself in Lesbos. Amidst photographing many of the birds, I found myself, without thinking about it, taking photos of several of the insects I came across. Initially, this was done as an aid to help me identify them when I got back home, but others were simply too irresistible! I had extended my digiscoping to insects.
Back home with and the onset of summer, my use of my digital camera was to take another turn. Visiting one of my local birding patches, I came across a Southern Hawker Aeshna cyanea, and without thinking about it, I removed the scope adapter from the camera and started photographing it. This one action deemed my traditional SLR camera set-up redundant and I haven’t used it since.
By combining both traditional use of my digital cameras (I now have two) with the ability to attach either of them to my scopes (I have several with different size objectives), I have a formidable armoury for photographing all aspects of wildlife. If an insect is close and approachable, I make use of the macro lens facility on the camera and use it in the conventional manner. If the insect is not close, high in a tree say, or is simply flighty and won’t allow close approach, I can attach the camera to my scope and photograph it from a distance.
I don’t think I need to describe here how I use a digital camera in the traditional manner, but I will describe how I use it when combined with my telescope.
My main digiscoping camera is a Nikon Coolpix 995. The Coolpix series has established itself as the camera of choice for digiscoping. The main reasons for this are 1) it has an internal moving lens so that the camera’s lens can be placed as close to the scope’s eyepiece as possible; 2) it has a filter thread which allows the attachment of an adapter that slips over the scope’s eyepiece; 3) it has a rotating monitor which allows you to angle the monitor to suit your viewing angle. The 995 model which I have (4500 is the current model) has a 3.3 million pixel capability.
I attach the camera to my scope by means of a simple (London Camera Exchange) adapter which slides over the eyepiece and is secured by up to three plastic screws (I only use one). The adapter lives on the camera in my shoulder bag and is therefore always ready to be used with the scope when the need arises. To use it conventionally, I take the adapter off if necessary (it depends on what level of zoom the camera is set on as to whether the adapter can be seen by the camera’s lens).
I use two telescopes, a Leica APO Televid 77 and the smaller Leica APO Televid 62. I tend to use the 77mm much more, but in summer, the 62mm is becoming more or less my constant companion. It’s much smaller and lighter to carry, and with the brighter days of summer, the need for the extra light gathering of the 77mm isn’t essential (when photographing birds in the dull of winter, a larger objective scope provides much more light and faster shutter speeds). Perched insects also move far less than birds (or mammals) do, and so a slower shutter speed can be tolerated.
As to which telescope eyepiece to use, the lower the magnification the better. Some scope manufacturers do not offer anything under 30x, but Leica have an outstanding 20x wide angle lens which is simply superb for digiscoping. This eyepiece fits on both scopes, and is 20x on the 77mm and 16x on the 62mm. I occasionally use the 32xWA (or 28xWA on the 62mm) eyepiece, but I never use my 20x-60x (16x-48x on the 62mm) zoom eyepiece. All three of these lenses are the same external diameter so the one eyepiece adapter can be used on them all. The reason I go for the fixed lower magnification is simple. Digital cameras are light-hungry, and the higher magnifications allow less light to pass through to the camera and have a much narrower field of view – essential for locating and tracking your subject. Less light also means slower shutter speeds.
My camera mounted on the eyepiece of my Leica APO Televid 77 using the special adapter – cable release and sunshade also attached and ready to use

Digiscoping is a compromise allowing those already with the scope and tripod to add a camera and take photos (and good ones at that). The sturdier the tripod and the smoother the head the better for photography. But since birding (or isnect-watching) is still the primary activity, most people don’t want to start investing in more kit, especially heavier tripod when the trend in recent years is to move towards lightweight carbon fibre models. I use a Manfrotto Carbon Fibre 441 with a Manfrotto 700RC2 head (recently introduced). This is still very much a birding set-up which is competent for digiscoping.
The camera settings are critical in the pursuit of good photos. I only ever use the camera in manual mode where I can pre-set my preferred options which the camera then saves. This means that when I turn the camera on, it is already set up exactly how I want it. As it happens, part of the manual setting for use with the scope includes the camera being pre-set in macro mode, so even if I am using the camera conventionally to photograph an insect, it is already set up for macro use. My other preferred settings are –
aperture priority
double frame exposure – the camera takes two photographs one after the other with each press of the shutter release
fine mode – there are several image qualities to use: basic, normal or fine – I use the highest quality to achieve the best results
large file size – again, several settings limit the overall size of the image from the conventional 35mm slide size to aroundA3 in size – the bigger the file and the higher the quality, the fewer images an individual card can store – I get 82 images on a 128Mb card
image sharpening set to high – this simply sharpens each photo digitally as it is stored to the memory card (this is generally better than sharpening on the computer, but the image can be further sharpened if necessary once downloaded)
centre-weighted focusing – this concentrates the camera’s auto focusing in the centre of the image
lens zoom setting – most digital cameras come with an optical zoom element and a digital zoom capability. I (like most digiscopers) use the optical zoom (4x on the Coolpix 995) as standard – I use the digital zoom very rarely. If it’s out of range of the optical zoom x scope eyepiece, then it’s too far away to bother with (unless perhaps, a record shot is required)
In addition, I also use a remote cable release with my camera to reduce shake. As you can imagine, using a camera on 4x optical zoom with a 20x eyepiece produces a highly magnified image which is prone to shake, so using a remote device to fire the shutter reduces the risk of introducing any additional shake. The device I choose to use is Nikon’s digital cable release. This allows me to operate not only the shutter release, but also the zoom facility of the camera lens. Manual mechanical releases are also available.
So, when I’m in the field and come across a subject to digiscope, I first focus the scope on the subject, I then reach in to my shoulder bag grabbing the camera at the same time as reaching into my pocket for the remote cable release. The remote cable attached I then turn on the camera and whilst it is booting up (it is after all a mini computer!) I attach it, using the already mounted adapter, to the scope’s eyepiece. Once the camera is attached, a single depress of the cable release shutter button, the image appears on the camera’s monitor and the camera is ready to use. This all sounds complicated and laborious, but in reality we are only talking about 30 seconds from reaching for the camera to seeing the image on the monitor!
Me digiscoping a Green-winged Teal in Peterborough © Katie Fuller

Now the fun starts! Few tripods and heads can truly cope with the combined weight of the scope and camera or the sensitivity needed to photograph at high power. So some tweaks of the head to position the subject in the centre of the frame are usually necessary, maybe a slight adjustment of the telescope’s focusing, then I can start zooming in and out and taking my photos. And I don’t just take one or two – I will often take dozens, sometimes over a hundred of the same subject. Admittedly I take fewer shots of insects than I do a moving bird or mammal, but none the less, each image costs nothing, as there are no film or processing costs.
In the field you are limited only by the amount of memory cards you have and how many shots you choose to store on each. If you do not have a laptop or other storage device to hand, then you can flick through each card viewing each image taken on the monitor and delete those images you don’t want and so creating space for more images. If things are getting critical, and you are in fine mode and the one of the larger image size settings, you can increase the remaining space on your card by reducing the image size or dropping to normal. This just depends what your intended use of the end results are likely to be. If, like me, your aim is to publish in print your photos (as well as use then on the web) then you will want the highest quality and largest setting at all times. But if you are taking images that will only ever be used on the web, then you ca drop to basic and a lower file size. For example, using a 128Mb card I can get 82 images using fine mode and the largest file size. Simply by dropping down the file size, this increases to around 130 images. By then dropping to normal quality I can get 250 images and on basic (web only use) I get a staggering 450 images!
When I have used up all the available space on one card, I simply remove it and slide in another. I have three compact flash cards – two 64Mb cards and a 128Mb card (in addition to the 16Mb card that came with the camera, which I never use as it stores too few images). It is better to use several smaller cards than one big one (512Mb), as like all digital media, compact flash cards can corrupt. I have replaced one 64Mb card in 18 months. Also, don’t buy your cards from a high street store – search the web and you will find them far cheaper – sometimes for half the price!
After a day’s wildlife watching and photographing, I return home my memory cards full of images ready to download on to my computer. This is done either by connecting the camera directly to the computer, or, as I prefer, inserting each memory card into a card reader attached to my computer (creating an additional drive). I can then transfer the images from the card to the computer’s hard drive just as I would copy files from a floppy disk or CD. Once the photos are on the computer’s hard drive, you can then do with them what you will!
The first thing to do is to delete all the duff images – there’ll be plenty of those! When it comes to image manipulation, most people tend only to ‘touch up’ their images. Using Adobe Photoshop, I tend only to touch up images as and when I use them. I first take a copy of the original image (I never manipulate an original) then I usually only alter the brightness and contrast and then sharpen them a little. Rarely do I try to adjust any of the colour balances, but software such as Photoshop is very powerful and will basically allow you to do whatever you want. I also have multiple copies of all my saved images – one set on the desktop, a set on my laptop, a set on an external hard drive and a fourth set on CD! My laptop is fast getting clogged up and I will soon only use this to download onto, rather than as a store. I also use my laptop to download on to when on trips. I can take over a thousand photos in a fortnight’s holiday, so unless you take loads of memory cards, a laptop is essential. Since most of my holidays are leading wildlife tours, I can also pull together the best of the images form the trip and produce a Powerpoint presentation for the trip participants at the end of the week (depends how little sleep I want!).
Moving over to a digital camera, and using it in combination with my telescope, has transformed not only my photography, but my overall enjoyment as a wildlife observer. I get endless use out of the images I have taken. I am lucky that I have now easily recouped my initial outlay, having had my images used by magazines such as Bird Watching and Practical Photography (I had the 17th photographed I ever took with my Coolpix 995 published in both magazines!), and in brochures for Leica and Speyside Wildlife. I have sold prints of some of the rarer birds I have photographed, I give images free to my local bird club for use on their website (www.peterboroughbirdclub.org.uk), and to my county club for use in the annual bird report (Cambridgeshire), and share my pictures with friends to use as computer screen backgrounds or as prints. I am also in the process of building my own website (www.toadsnatcher.com), on which I will have a gallery of some of my better images.
The only thing limiting digital photography is the user’s own imagination. Embrace, enjoy and enliven your wildlife watching with digital technology!
Digiscoping gallery – Leica scopes with Nikon Coolpix 995

Blue-tailed Damselfly. Female form rufescens. Suffolk. June 2003. Leica APO Televid 62 with 16xWA eyepiece and Nikon Coolpix 995. ISO 100. F4.6. 1/1000th second.

Emperor Dragonfly. Ovipositing female. Cambridgeshire. June 2003. Leica APO Televid 62 with 16xWA eyepiece and Nikon Coolpix 995. ISO 100. F4.6. 1/1000th second

Four-spotted Chaser. Immature male. Lincolnshire. June 2002. Leica APO Televid 77 with 20xWA eyepiece and Nikon Coolpix 995. ISO 100. F3.5. 1/125th second.

Norfolk Hawker. Male high in an oak tree. Suffolk. June 2003. Leica APO Televid 62 with 16xWA eyepiece and Nikon Coolpix 995. ISO 100. F5.1. 1/300th second.

Southern Hawker. Male. Cambridgeshire. July 2002. Leica APO Televid 77 with 20xWA eyepiece and Nikon Coolpix 995. ISO 100. F4.8. 1/20th second.

Variable Damsefly. Male. Suffolk. June 2003. Leica APO Televid 62 with 16xWA eyepiece and Nikon Coolpix 995. ISO 100. F5.4. 1/10th second.

Painted Lady. Cambridgeshire. August 2002. Leica APO Televid 62 with 16xWA eyepiece and Nikon Coolpix 995. ISO 100. F5. 1/10th second.

Painted Lady. Cambridgeshire. August 2002. Leica APO Televid 62 with 16xWA eyepiece and Nikon Coolpix 995. ISO 100. F4.1. 1/125th second.

Spotted Fritillary. Lesbos, Greece. April 2002. Leica APO Televid 77 with 20xWA eyepiece and Nikon Coolpix 995. ISO 100. F6.1. 1/1000th second.

Epallage fatime. Female. Lesbos, Greece. April 2002. Leica APO Televid 77 with 32xWA eyepiece and Nikon Coolpix 995. ISO 100. F4.2. 1/1000th second.
Some hand-held photos taken with my Nikon Coolpix 995

Southern Hawker. Male. Cambridgeshire. July 2002. Hand-held with Nikon Coolpix 995. ISO 100. F5.1. 1/1000th second.

Scarce Chaser. Cambridgeshire. June 2003. Hand-held Nikon Coolpix 995. ISO 100. F5.1. 1/1000th second.

Red-eyed Damselfly. Cambridgeshire. June 2003. Hand-held with Nikon Coolpix 995. ISO 100. F5.8. 1/1000th second.

Small Tortoiseshell. Cambridgeshire. July 2002. Hand-held with Nikon Coolpix 995. ISO 100. F5.1. 1/125th second.